Description
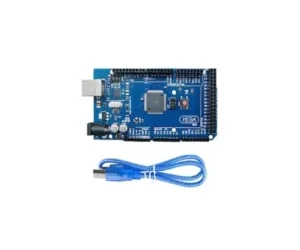
The microcontroller model of this board is the same as the original one (Atmega328). The only difference between microcontrollers is the package. The original one has a DIP package but the clone one has an SMD package microcontroller. It’s more powerful as compare to the dip version.
Specifications of Arduino Uno:
- ATmega328-AU microcontroller with UNO Bootloader Installed.
- USB Programming Facilitated by the CH340G.
- USB-B Connector and cable included.
- Input voltage – 7-15V.
- 0-5V outputs with 3.3V compatible inputs.
- 14 Digital I/O Pins (6 PWM outputs).
- 6 Analog Inputs.
- ISP Header.
- 32k Flash Memor.y
- 16MHz Clock Speed.
- All SMD Construction.
- R3 Shield Compatible
Package Includes:
- 1 x Arduino Uno R3 Board
hallroad.org is Best Online Shopping website for electronics, Here you get Arduino Uno R3 Board KIT at a reasonable price in Karachi, Lahore, Islamabad, Rawalpindi, Peshawar, Multan and All over Pakistan.
Specifications of the Arduino Uno board:
- Reset button: It’s used to reset the program that is loaded onto the microcontroller on the board. In the case of that Arduino Uno stops responding it is the on and off button that allows it to reset itself.
- Pins or input and output ports: are the pins that are to connect the components, sensors and actuators that require digital signals.
- USB port: It is used to connect an operating system(Conputer) and to transfer or load software to the microcontroller and also to provide power to the Arduino. It can also be used as an interface for serial transfers to the Arduino, for both sending and receiving data.
- USB interfacing chip: is responsible for managing communication via it’s USB port.
- Oscillator clock: It is the part that helps the Arduino run the program. It is responsible for setting the timing that each instruction of the program is executed.
- Power LED: It’s a tiny light source that turns on whenever the circuit is powered.
- Microcontroller: This is the brain on every Arduino-based board. This is the part responsible for the execution of the instructions in the software.
- Voltage regulator: This is used to regulate the amount of power that is delivered to the pins and making sure that the electrical connection we make to these pins will not be damaged.
- DC port: This port is is used to power the board in the event that USB powered power cannot be being used.
- Tension socket: Here are the pins that we will connect our circuit.
- Analog inputs: Socket with various analog input pins for the reading of analog inputs.
Arduino Uno pinout – Power Supply:
There are three ways to power Arduino Uno: Arduino Uno:
Barrel Jack The Barrel Jack or DC Power Jack can be used to power an Arduino board. This connector can be typically connected to an adapter for the wall. The card is powered by 5-20 V, however, the manufacturer suggests maintaining it at 7-12 Volts. At higher than 12 volts the regulators can overheat at a lower voltage it may not be enough.
VIN Pin The pin used to power Arduino Uno. Arduino Uno board with an external power source. The voltage should be within the limits mentioned above.
USB Cable when connected to a computer it delivers 5 volts at 500mA.
Arduino Uno Pinout – Analog IN:
Arduino Uno is a board that has 6 analog pins that make use of ADC (Analog to Digital Converter).
These pins are analog inputs but also serve as digital outputs, inputs, or digital inputs.
Arduino Uno Pinout – Digital Pins:
The pins 0-13 of Arduino Uno serve as digital input/output pins.
The pin 13 on the Arduino Uno is connected to the integrated LED.
For the Arduino Uno the pins 3,5,6,9 and 10 have been identified as PWM capable .
It is important to keep in your mind:
Each pin is able to provide up to 40 mA maximum. The suggested current is 20 milliamps.
The maximum amount of current that can be supplied by all pins is 200 milliamps.
Main Changes from the older version:
- Add two rows of the holes for the pins. So it can be connected with a normal Dubond line.
- Add 3 rows of the holes for wiring.
- Change the in-line package of ATMEGA328P to flat package.
- CH340G Replace ATmega16U2
- Plug the UNO development board, the driver will be automatically installed.
- select the board UNO inside the die.
- Select the COM port, this can be in my computer queries, just inside your UNO port development board
- You’d better choose Arduino own routine procedures, burn into the board
Arduino Uno Pinout – ICSP Header:
The term ICSP is a reference to In-Circuit Serial Programming. The term was coined out of the program headers within this system (ISP). Manufacturers such as Atmel who work with Arduino have created their own serial programming headers in circuits. These pins permit users to program the firmware on Arduino boards. The Arduino board has six ICSP pins that are available within the Arduino board, which are connected to a computer by using a cable for programming.
Best Online Shopping website for Arduino. Here you get Arduino UNO R3 at a reasonable price in Karachi, Lahore, Islamabad, Rawalpindi, Sukkur, Peshawar, Multan, Quetta, Faisalabad and all over Pakistan.


Reviews
There are no reviews yet.